Tie-dye is one of history’s most popular clothing designs, and it’s back. If this is news to you then you’ve not been paying attention. Do a quick search of ‘Celebrities wearing tie-dye’ and you’ll find everyone from Jennifer Lopez to Jack Black sporting their 60’s throwbacks. To celebrate, we decided to make our own.
I was pretty excited, having not made tie-dye shirts since I was about nine. To make the whole process more worthwhile, we’ve used our experience to make a step-by-step guide to tie dyeing. We’d hoped our personal experience would contribute by showing you how to do it perfectly, but what we actually did was discover all the mistakes you might make. At least now we can tell you how to avoid them. So read on to learn exactly how to make, and how not to make, tie-dye t-shirts.
1. Choose Your Design
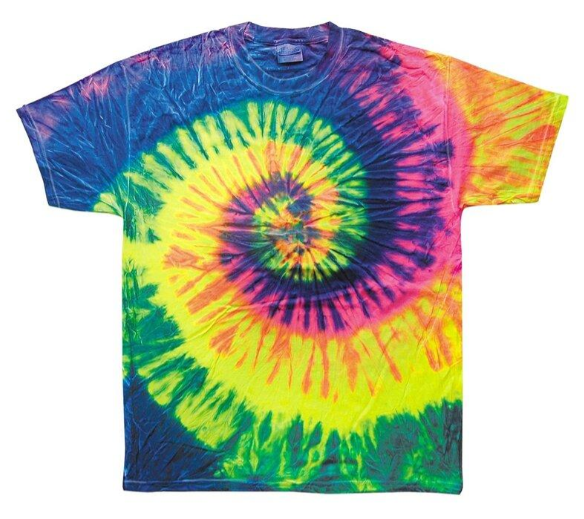
I went into my tie-dye session with an open mind. Modern tie-dye clothing is much more subtle than the classic rainbow tie-dye we associate with the 60s. Usually only one or two colors are used, they’re softer. Crumple patterns (random blotches of color) are now more common than the famous spiral.
So my first thought was to do something understated like that, and then I went in completely the opposite direction. I figured I might only do this once, so I might as well make a really cool rainbow tie-dye t-shirt, with a big spiral on it.
Here we see the importance of planning. My sudden change of heart was only possible because there was a big group of us, and we’d bought all the colors of the rainbow. Decide on your design beforehand so you can get the right colors, and anything besides rubber bands that you need for your resists (the things that stop the ink getting to certain places).
2. Get Everything You Need
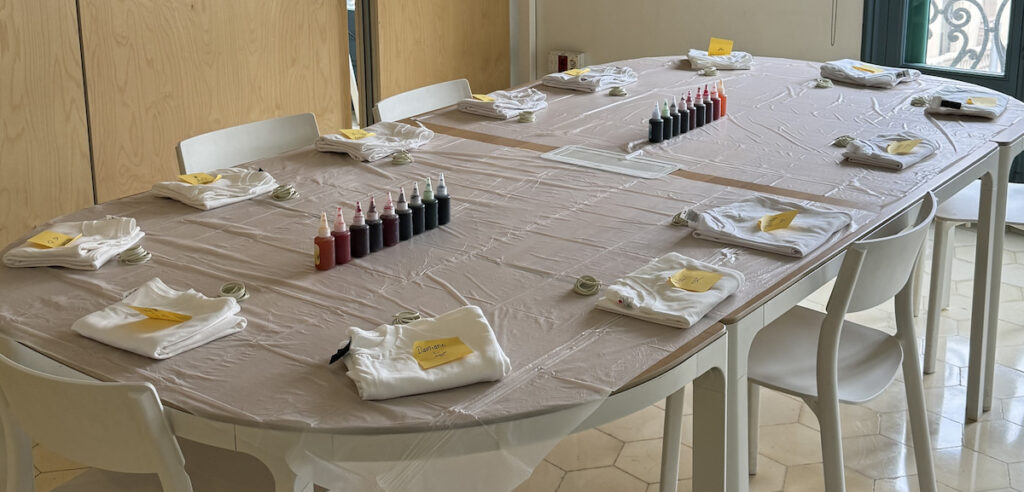
First step is to get some white t-shirts. Natural materials work best, as the dye doesn’t bind well with synthetic fibers. Silk and rayon are fine, but cotton is the classic. A bit of polyester isn’t a problem, but ideally you want 100% cotton. Perfectionists should get a couple per person, so you can get the second right if you mess up the first. If the t-shirts are brand new, it’s often worth washing them first– that sheen you sometimes get on new clothes can affect the dyeing process.
You need dye of course. Think about what colors you’ll want, and it helps to have them in squeezy bottles. You need dyes that work well on cotton t-shirts, they’re called fiber-reactive– Procion dyes are the industry standard. Check the instructions on the dye, but you should just need to mix it with warm water. You should also have soda ash to help the color hold.
To make your resists, the classic technique is to use rubber bands, but there are other things you can use. A wooden stick is helpful for making spirals, and you can tie small pebbles or seeds into the shirt to make other effects.
To stop the dye getting everywhere it shouldn’t, get plastic sheets, rubber gloves, and zip-lock bags to leave the t-shirts in. Have some cleaning supplies to hand just in case.
Checklist:
- White t-shirts
- Dye in squeezy bottles
- Rubber bands etc. for your patterns
- Gloves, plastic sheets and bags
- Cleaning supplies.
You can also get pre-packaged kits, which come with everything.
3. Soak Your T-Shirts
Soaking the t-shirts in soda ash helps the colors to hold, so they won’t fade with each wash. If you are only going to wear your t-shirt a couple of times, you can skip this section. You may have to, if your boss says you can’t spend too much of your work day making t-shirts.
Put soda ash and warm water (not too hot or cold) in a tub or bucket, check the instructions on the soda ash for exactly how much to use. A couple of teaspoons of table salt also helps. Once the mixture is dissolved, get your rubber gloves on and soak the t-shirt for about 10 minutes. Wring it out after, or give it a spin in the washing machine.
4. Time to Tie
Now the fun starts. How you tie determines the design, so have an idea of what you want before you start. The crumple method is easy, just scrunch up the shirt and put some bands around it. Note that the tighter you bind it, the harder it is for the ink to get everywhere, so if you want white with some dashes of color, bind tightly, and if you want color with dashes of white, bind loosely.
To make circles, take a chunk of t-shirt and put a rubber band around it like you would a ponytail. Stripes can be done by rolling the t-shirt into a sausage shape, and then putting bands around tightly, at regular intervals.
I wanted the spiral, and for that you place your dowel or other stick where you want the center to be. Turn your stick to make the t-shirt into a spiral, or ideally get someone to hold the stick while you turn the t-shirt, which helps it to stay as flat as possible. Use your rubber bands to bind it and make wedges, so it looks like a pizza. If you don’t have a stick you can just pinch the t-shirt, and if you don’t have anyone with you then make an extra effort to keep it flat, or like me you’ll end up with something that looks more like a basketball than a pizza (which might get you into trouble later).

You can also use your sticks, seeds, rocks and other objects here to make more designs. We can’t list them all here, but if you have something specific in mind, you can look up how to make the right resists.
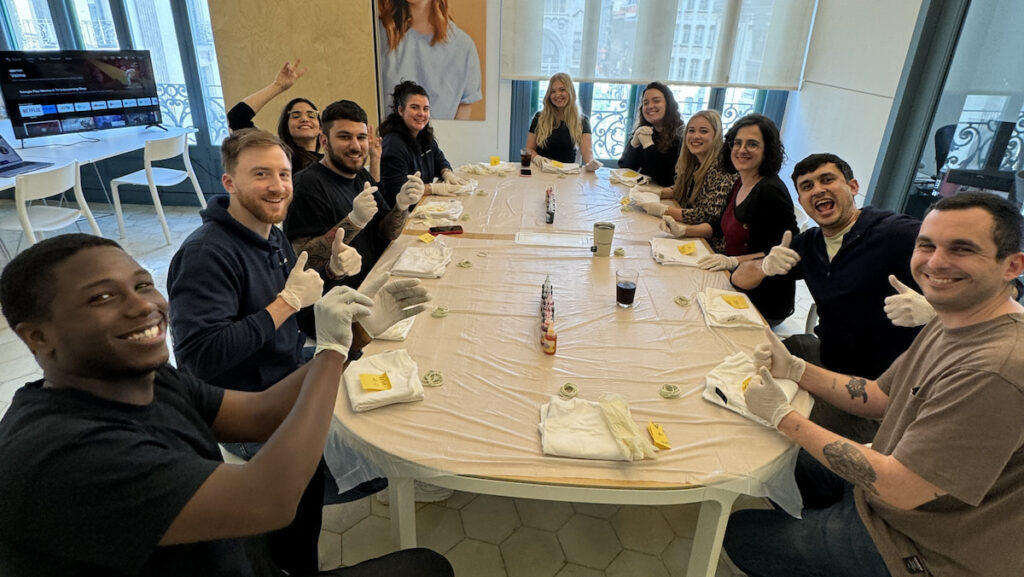
5. Get Busy Dyeing
Time to add your dye. This is where your plastic sheets and cleaning supplies are important. Doing it outside is a good way to avoid coloring your furniture, otherwise you need to cover everything up. Gloves are key if you don’t want to have rainbow hands for a couple of days, and of course, don’t wear white clothes (that you want to stay white).
It’s best to start with the lighter colors, as you can always add darker colors over the top later. You need to think carefully about how much dye to add (something I found out the hard way). This will be down to how much color you want, and how tightly your t-shirt is bound. If you want lots of color then think about how thick your pizza/ball/sausage is, and use enough dye to get to the middle. With the sausage-stripe technique, people often dip the shirt in dye so it absorbs enough.
The plastic sheet is helpful here as it keeps hold of excess dye, and you can sponge it up with the t-shirt. Just be sure to move the shirt when you change colors, so you don’t mix them unintentionally.
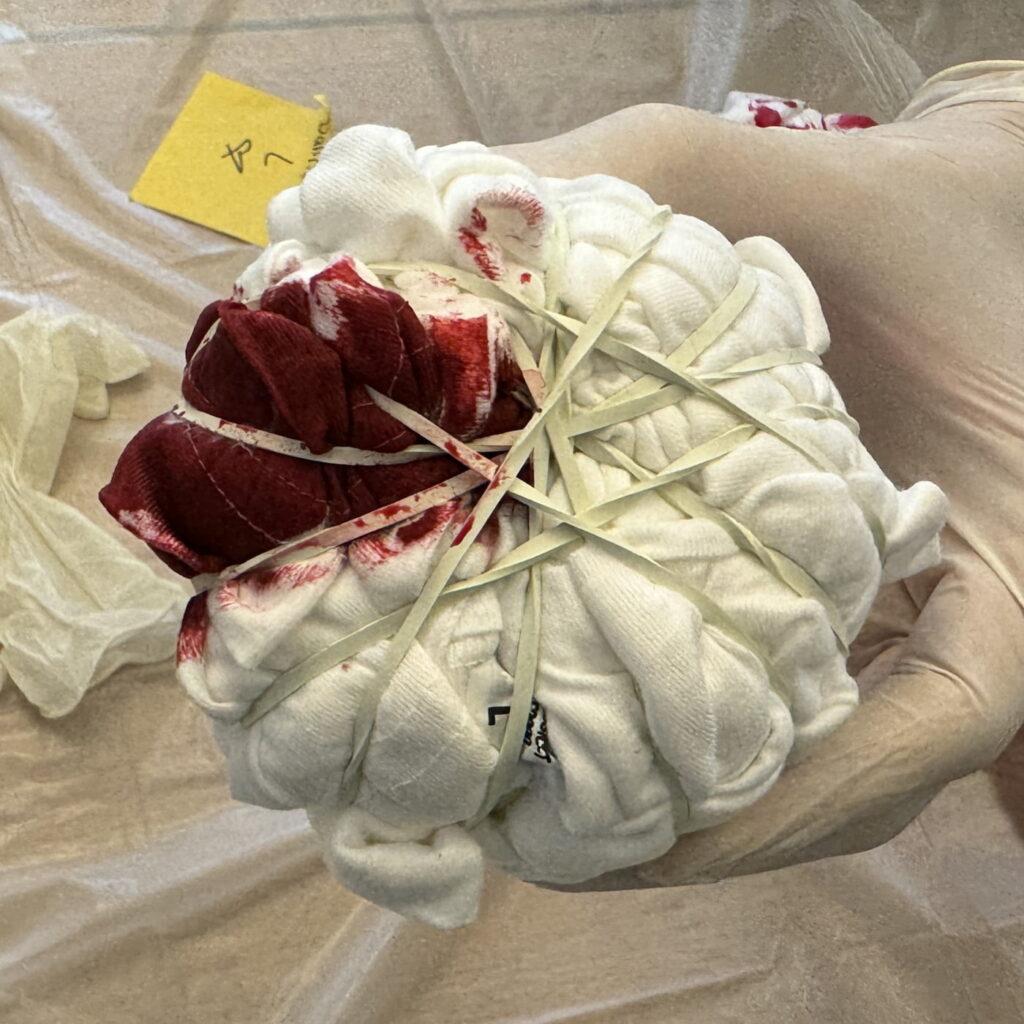
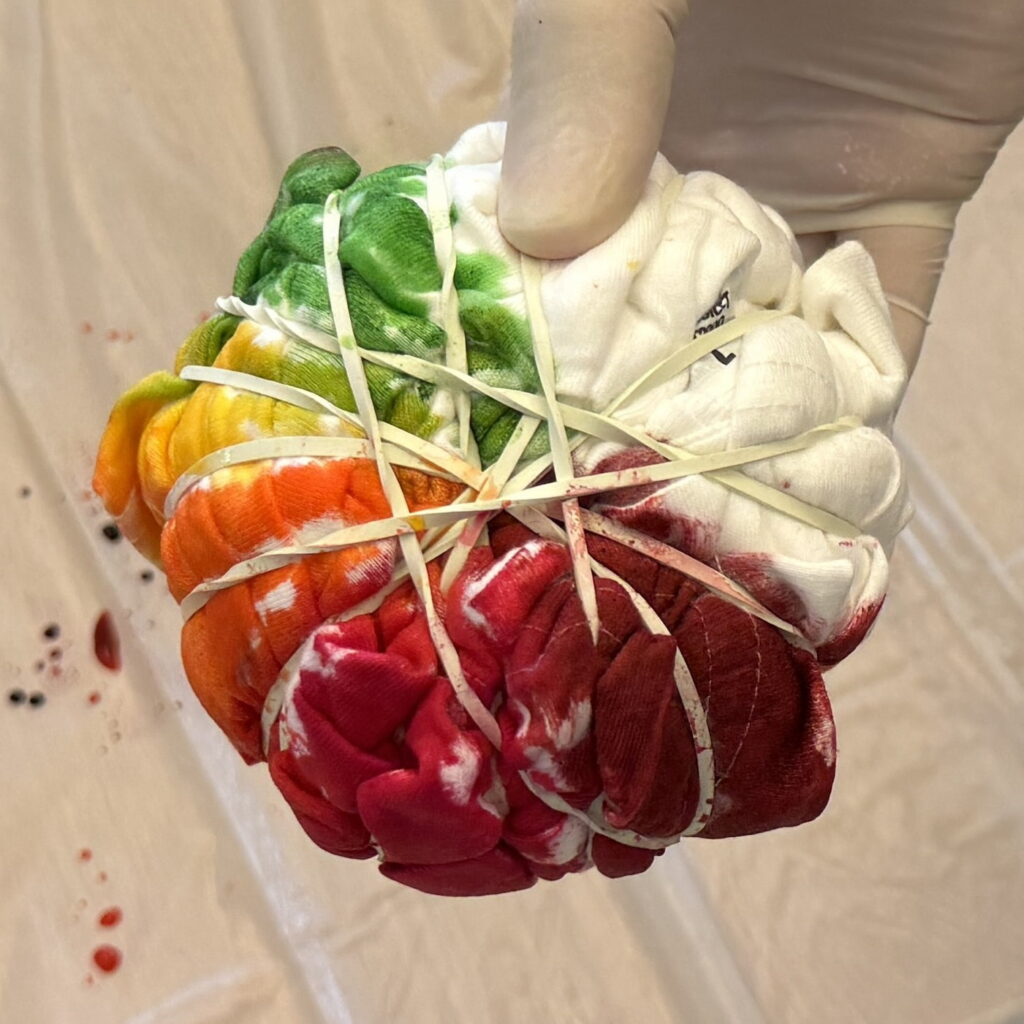
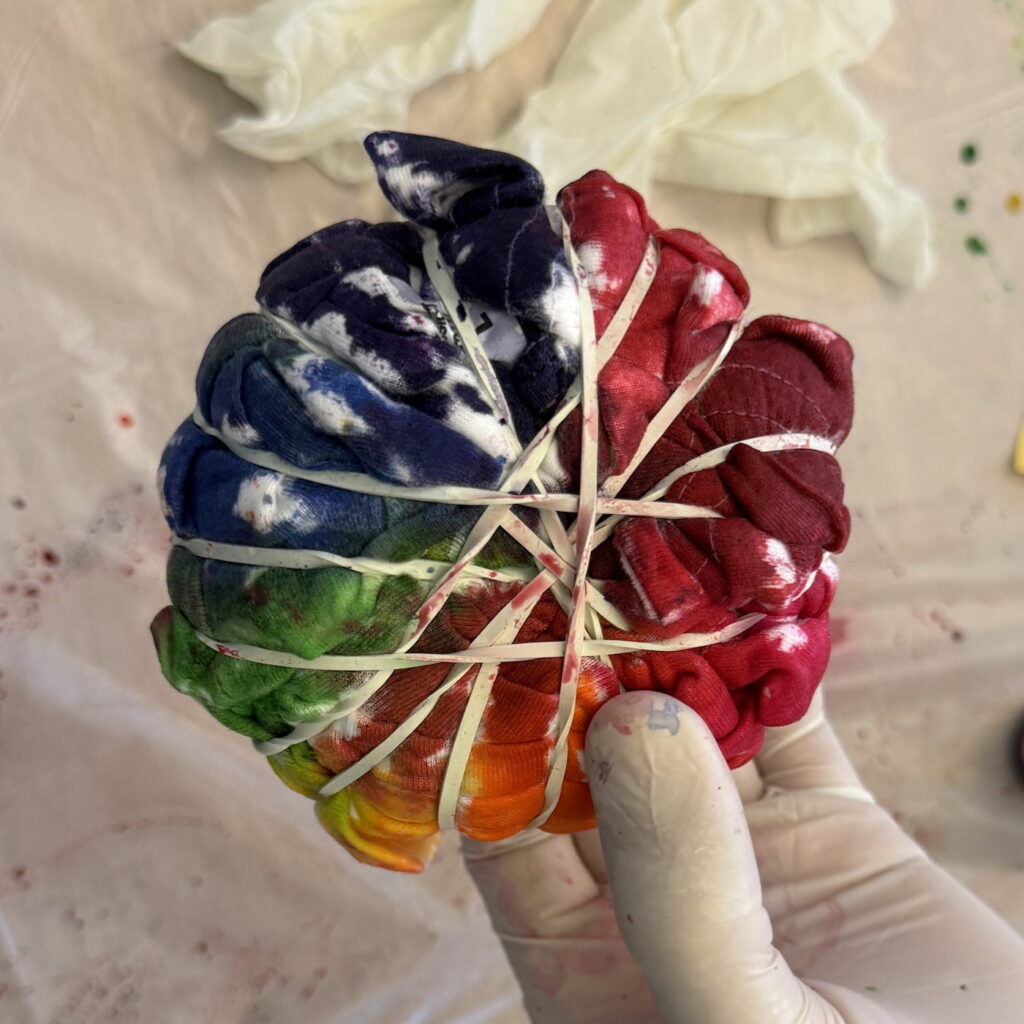
For the rainbow tie-dye, you want to make each wedge of the “pizza” a different color, making sure the colors match up when you flip it over to dye the other side. The sections should look like the beautiful ball I have in the photo, although yours will hopefully be a little flatter, to allow more dye to reach the middle.
Planning is very important at this stage. The last thing you want is to be stuck with one empty wedge at the end that you don’t know what to do with (in case you were wondering why mine goes pink-red-pink). So count your colors and put them in order beforehand.
6. Wait, and Hope
It’s best to leave it in a zip-lock bag to keep the dye damp for longer, and so it doesn’t stain anything else. Wait for at least 8 hours, but ideally over 24, to give the die time to bond. You can repeat these last three steps if you want, to create more complex designs. Then when you finish, take the rubber bands off and marvel at your creation.

Or not. I may have mentioned that we learned some lessons the hard way, the most significant being to put enough dye on. Most of us had the same problem, but there were a few who figured out that tying less tightly would give them more color. Mine definitely looked better when it was a ball, but I actually quite like it. It’s clearly not what I set out to make, but I guess that’s the beauty of tie-dye.
7. Final Steps
Before you wear it, rinse it under a cold tap, you may find a lot of dye comes out straight away. You should also wash it at least once on its own before you put it in with other clothes, and definitely don’t wash it with anything white.
The Verdict

Do as I say, and not as I did, and you can make great tie-dye t-shirts. It’s also a very fun activity to do, especially with other people, so it’s worth having a go even if you don’t get it quite right. To get a result you’re genuinely happy with, I recommend one of the following options:
- Study well before, if you’re not sure why– see above photo. That you’re reading this guide bodes well.
- Go in with low expectations, and agree to just be happy with whatever you make.
- Commit to trying it a few times, so you can get it right.
- Just buy a really cool rainbow tie-dye t-shirt, with a big spiral on it.
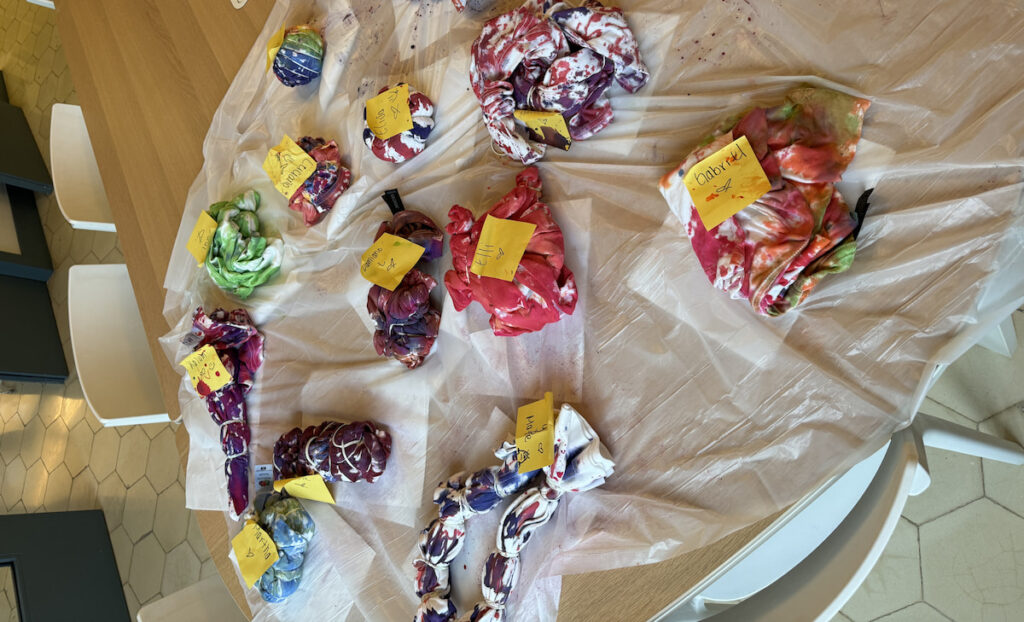
See How We Got On
You can buy a lot more besides tie-dye at Wordans, so head over to our website for great-value apparel, accessories, and other promotional products. For more fashion tips and tricks– our Instagram, @wearewordans, is the place to be.